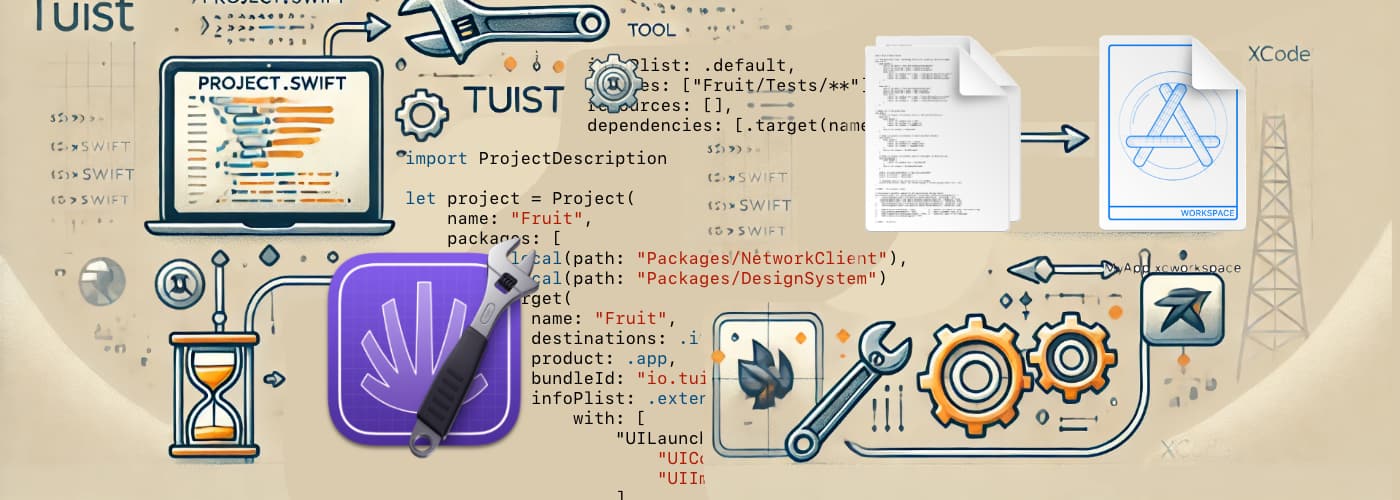
An introduction to Tuist
Generative work of art for added production value lol.
Tuist is a tool to generate Xcode project files from a declarative description. These are the .xcodeproj and .xcworkspace files.
Index
Why Tuist?
Tuist exists to solve challenges related to working with Xcode.
- Complexity. Xcode projects contain numerous settings. You set them from various places of the the UI, and store them in many proprietary files. This is prone to errors, inconsistencies, and difficult to track in version control.


-
Compilation speed slows down in large projects. This is due to exponential complexity in the type checker. Contributing factors are type inference, overloading, and type constraint solving, among others. The solution is to split the project into smaller parts. This also enforces modularity and allows us to focus on individual subprojects.
-
Lack of templates. Xcode uses a template language called GYB (Generate Your Own Boilerplate). I found GYB challenging to work with, which is perhaps why it is not exposed.
-
Implicit builds. Xcode makes default decisions that simplify work. But, they also hide the build process. Declarative explicit files offer more control. For instance, we can switch SPM to XCFrameworks with few changes. This will significantly speed up compilation.
Now the good news. Most settings in a project are default settings. This means a declarative text file with minimal length could solve the problem. That’s what Tuist is going to provide.
Installing Tuist
The recommended installation uses mise, a package manager similar and compatible with brew.
So first install mise.
# install mise with brew
brew update
brew install mise

# or install mise with curl (but not both!)
# curl https://mise.run | sh

# did it work?
~/.local/bin/mise --version

# add it to ~/.zshrc
echo 'eval "$(~/.local/bin/mise activate zsh)"' >> ~/.zshrc
source ~/.zshrc

# FYI: if you ever want to uninstall mise here is how
# mise implode
Then install Tuist.
# install latest version
mise install tuist

# or upgrade the current version with the latest
mise install tuist@latest

# sometimes you may need a specific version
# mise install tuist@4.18.0

# change version globally
# this version is set in ~/.config/mise/config.toml
# mise use --global tuist@4.18.0
.mise.toml
I was working with a project that uses an old version of Tuist. Instead of changing the global version, I found out that mise lets you use a different version per folder!.
Here is how it works. The version is set on a file named .mise.toml in the project’s root directory. For instance:
[tools]
tuist = "4.18.0"
Next Tuist invocation will install and execute the version configured:
# invoking tuist installs the right version if needed
% tuist version
mise tuist@4.18.0 ✓ installed 4.18.0
4.18.0

# check version in use
% mise current tuist
4.16.0

# the version in .mise.toml can be edited with an editor or using mise
% mise use tuist@3.20.0
mise tuist@3.20.0 ✓ installed mise .mise.toml tools: tuist@3.20.0
The trick is that the tuist command in the path is a “shim.” A shim is a command that passes arguments to the real tool. But, it also does other jobs, like version management.
The trick is that the tuist command in the path is actually a mise “shim” that checks the configuration file and invokes the real tuist command. A shim is a command that passes arguments to the real tool, but performs other functions, in this case, version management.
Hello World!
Tuist has one (1) template. Let’s run it.
% mkdir Fruit && cd Fruit
% tuist init
% tree .
.
├── Fruit
│   ├── Resources
│   │   ├── Assets.xcassets
│   │   │   ├── AccentColor.colorset
│   │   │   │   └── Contents.json
│   │   │   ├── AppIcon.appiconset
│   │   │   │   └── Contents.json
│   │   │   └── Contents.json
│   │   └── Preview Content
│   │       └── Preview Assets.xcassets
│   │           └── Contents.json
│   ├── Sources
│   │   ├── ContentView.swift
│   │   └── FruitApp.swift
│   └── Tests
│       └── FruitTests.swift
├── Project.swift
└── Tuist
    └── Package.swift
And finally, generate the project files.
tuist generateRunning this opens Xcode automatically. We run the project, and get an iOS Hello World. Success!
Editing
To edit the project definition run tuist edit from the terminal:
tuist editThis opens your Tuist project definition in Xcode. Tuist uses Swift files to gain advantage of Xcode autocomplete. I trust you can figure out what each element is (“target name” is the name of the target and so on).
From here your mission is to use autocomplete, some common sense, and the Tuist reference. Everything is what it seems. You can also cheat and ask Claude/GPT about it. There is a chance they will answer using old Tuist syntax. You can also check the example projects in the documentation reference. They are at the bottom of the left column.
Dependencies
SPM
Let’s create a couple of packages using SPM:
mkdir Packages && cd Packages

mkdir DesignSystem && cd DesignSystem
swift package init --type library --name DesignSystem
cd ..

mkdir NetworkClient && cd NetworkClient
swift package init --type library --name NetworkClient
cd ../..
Now run tuist edit to edit the Project.swift. Add the following changes:
let project = Project(
    name: "Fruit",
    packages: [
        .local(path: "Packages/NetworkClient"),
        .local(path: "Packages/DesignSystem")
    ],
    targets: [
        .target(
            ...
            dependencies: [
                .package(product: "DesignSystem"),
                .package(product: "NetworkClient")
            ]
        ),
...
Now generate again (tuist generate) and you’ll see the dependencies in Xcode. What have we accomplished? Our project definition is now declarative and small (Project.swift). This greatly simplifies managing our project.
Dynamic Frameworks
Edit Project.swift
.target(
    ...
    dependencies: [
        // .package(product: "NetworkClient")
        .external(name: "NetworkClient")
    ]
Edit Tuist/Package.swift
// swift-tools-version: 6.0
@preconcurrency import PackageDescription

import struct ProjectDescription.PackageSettings

let packageSettings = PackageSettings(
    productTypes: [
        "DesignSystem": .framework,
        "NetworkClient": .framework
    ]
)

let package = Package(
    name: "Fruit",
    dependencies: [
        .package(path: "../DesignSystem"),
        .package(path: "../NetworkClient")
    ]
)
Now run
tuist install && tuist generateSwitch to XCFramework
Same configuration as dynamic frameworks but run
tuist cache && tuist generateGo back to dynamic frameworks
tuist clean && tuist install && tuist generateTemplates
This Hello World is going so well that I’m going to turn it into a template. First I’m going to copy a few folders and files to a hidden folder (~/.tuist/Templates/Hello`). “Hello” will be the name of the template I’m creating.
mkdir -p ~/.tuist/Templates/Hello
cp -R .gitignore .mise.toml Project.swift Fruit Packages ~/.tuist/Templates/Hello/
Templates have a definition file with the same name as the folder. Mind the comments.
cat << EOF > ~/.tuist/Templates/Hello/Hello.swift
import ProjectDescription

let template = Template(

    // visible when running tuist scaffold list
    description: "My Hello World project",

    // optional or required parameters to pass from the command line
    attributes: [
        .required("name")
    ],

    items: [
        // creates a 'README.md' file with the given string
        .string(
            path: "README.md",
            contents: "# Welcome to \(Template.Attribute.required("name"))"
        ),

        // copy files (I’m doing a 1:1 copy without changes)
        .file(path: ".gitignore", templatePath: ".gitignore"),
        .file(path: ".mise.toml", templatePath: ".mise.toml"),

        // copy folders
        .directory(path: ".", sourcePath: "Fruit"),
        .directory(path: ".", sourcePath: "Packages"),

        // copy processing the StencilSwiftKit directives
        .file(path: "Project.swift", templatePath: "Project.stencil")
    ]
)
EOF
So far this template is a big copy paste. For more sophisticated processes you can use StencilSwiftKit variables. Let’s do a bit of that. I’m going to replace the name: "Fruit" string in the template with the name parameter we added before. This should change the name of the project and the main target.
# rename Project.swift to Project.stencil
mv ~/.tuist/Templates/Hello/Project.swift ~/.tuist/Templates/Hello/Project.stencil

# replace name: "Fruit" with name: "{{name}}"
sed -i '' 's/name: "Fruit"/name: "{{name}}"/g' ~/.tuist/Templates/Hello/Project.stencil

# see the result
cat ~/.tuist/Templates/Hello/Project.stencil
I think my template is ready. Let’s try it.
cd ..
mkdir Orange && cd Orange

# templates always have to be at Tuist/Templates
# but I like keeping them in a global folder so I do this
mkdir Tuist
ln -s ~/.tuist/Templates Tuist/Templates

# list templates available
tuist scaffold list

# will it work?
tuist scaffold Hello --name Orange
tuist generate
It does work!
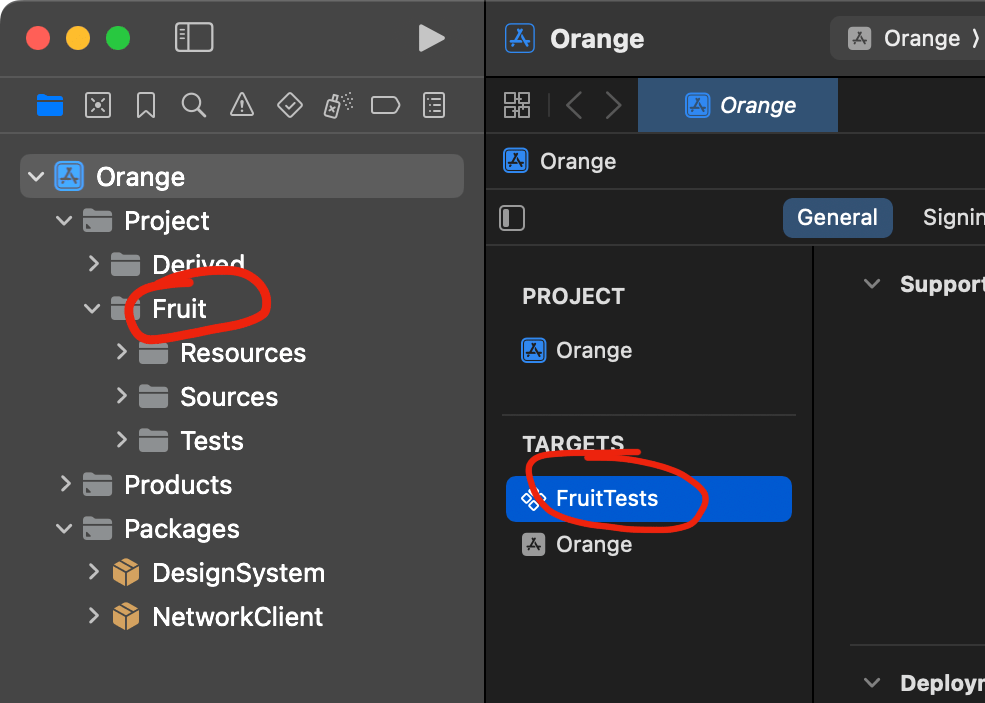
Almost perfect!
I missed those two names. This template needs a bit more work. But first, I have to finish the Fruit project.
Subprojects
I noticed Xcode takes a while to open SPM packages with many files. This is an inconvenience when I’m switching branches. I want my Fruit project to avoid that. I’m going to move the dependencies from Project.swift to Tuist/Package.swift. Any Project.swift in the project will see those dependencies. This reminds me, it’s possible to have more than one Project.swift file. They will all appear as subprojects in the workspace.
Changes to Tuist/Package.swift:
// swift-tools-version: 5.9
import PackageDescription

#if TUIST
import ProjectDescription
    let packageSettings = PackageSettings(
        productTypes: [
            "DesignSystem": .framework,
            "NetworkClient": .framework,
        ]
    )
#endif

let package = Package(
    name: "", // doesn't matter
    dependencies: [
        .package(path: "../Packages/DesignSystem"),
        .package(path: "../Packages/NetworkClient")
    ]
)
Changes to the Project.swift:
let project = Project(
name: "Fruit",
packages: [
// .local(path: "Packages/NetworkClient"), // <-- commented
// .local(path: "Packages/DesignSystem") // <-- commented
],
targets: [
.target(
name: "Fruit",
...
dependencies: [
.external(name: "DesignSystem"), // <-- changed
.external(name: "NetworkClient") // <-- changed
]
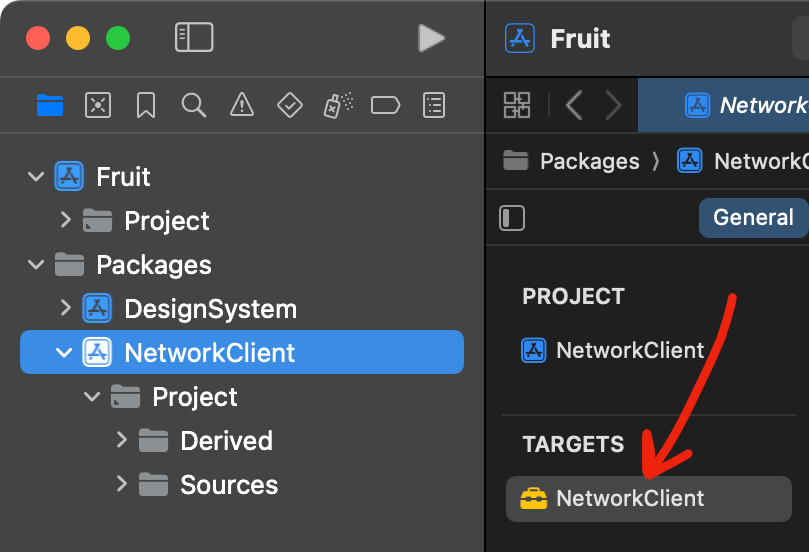
...Run tuist generate and the packages remain there, but they are now dynamic frameworks.
Dependencies as dynamic frameworks
And now for the final Tuist trick, run the following:
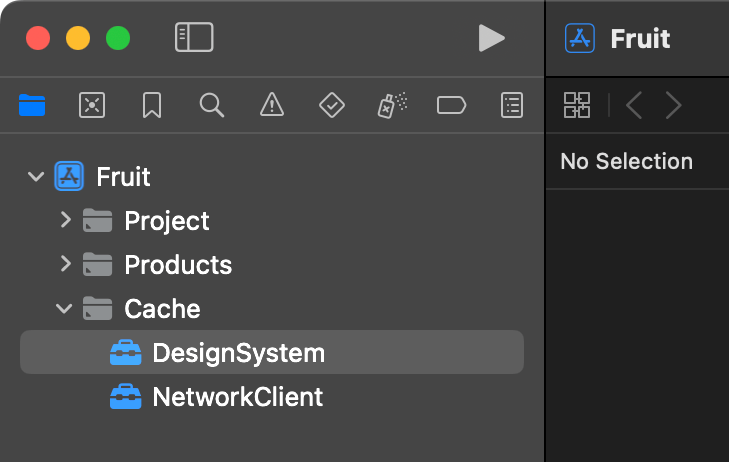
tuist cache
tuist generate
Now dependencies are XCFrameworks! That means the same binary for simulator and device. No package indexing or compilation is needed. We could even distribute these binaries to other developers. Binary repository solutions like Nexus can assist with that.
Dependencies as XCFrameworks
One last tip: It’s not uncommon for SwiftUI previews to stop working in complex projects. This happens because SwiftUI uses a different, lighter build system. Tuist will likely solve it if you build an explicit dependency tree. That is, add dependencies and their child dependencies to Tuist/Package.swift.
Conclusion
In this article we explored the challenges of working with Xcode. We installed Tuist, created a simple project, and edited its definition. Then, we converted it into a template. We also explored SPM, dynamic frameworks, and even binary XCFrameworks. Clearly, we can apply this knowledge to improve speed and maintenance in our projects.